How to Install Videcool on Ubuntu Linux
Installing Videocool on Ubuntu is a straightforward process. First you need to add the offical Videcool repository to your system by running a few terminal commands, and then you can use the built in package managment tools to install, upgrade (or uninstall Videcool) whenever you like. This guide walks you through each step, from installation to launching Videocool in your browser.
Commands
sudo curl -fsSL https://repo.ozeki.hu/ozekividecool.gpg.key | sudo gpg --dearmor -o /etc/apt/trusted.gpg.d/ozekividecool.gpg
sudo echo "deb [arch=all] https://repo.ozeki.hu/ noble main" | sudo tee /etc/apt/sources.list.d/ozekividecool.list
sudo apt update
sudo apt install ozekividecool
After installation navigate to:
Browser: http://localhost/ozeki
Quick steps
To install an VideCool follow these quick steps:
- Add the GPG Key
- Add the Ozeki Repository
- Update the package list
- Install VideCool
- Open VideCool in a browser
- Create Admin Account
- Log In as Admin
- View the VideoBuilder Service
- Explore the Dashboard
Step 1: Add the GPG Key
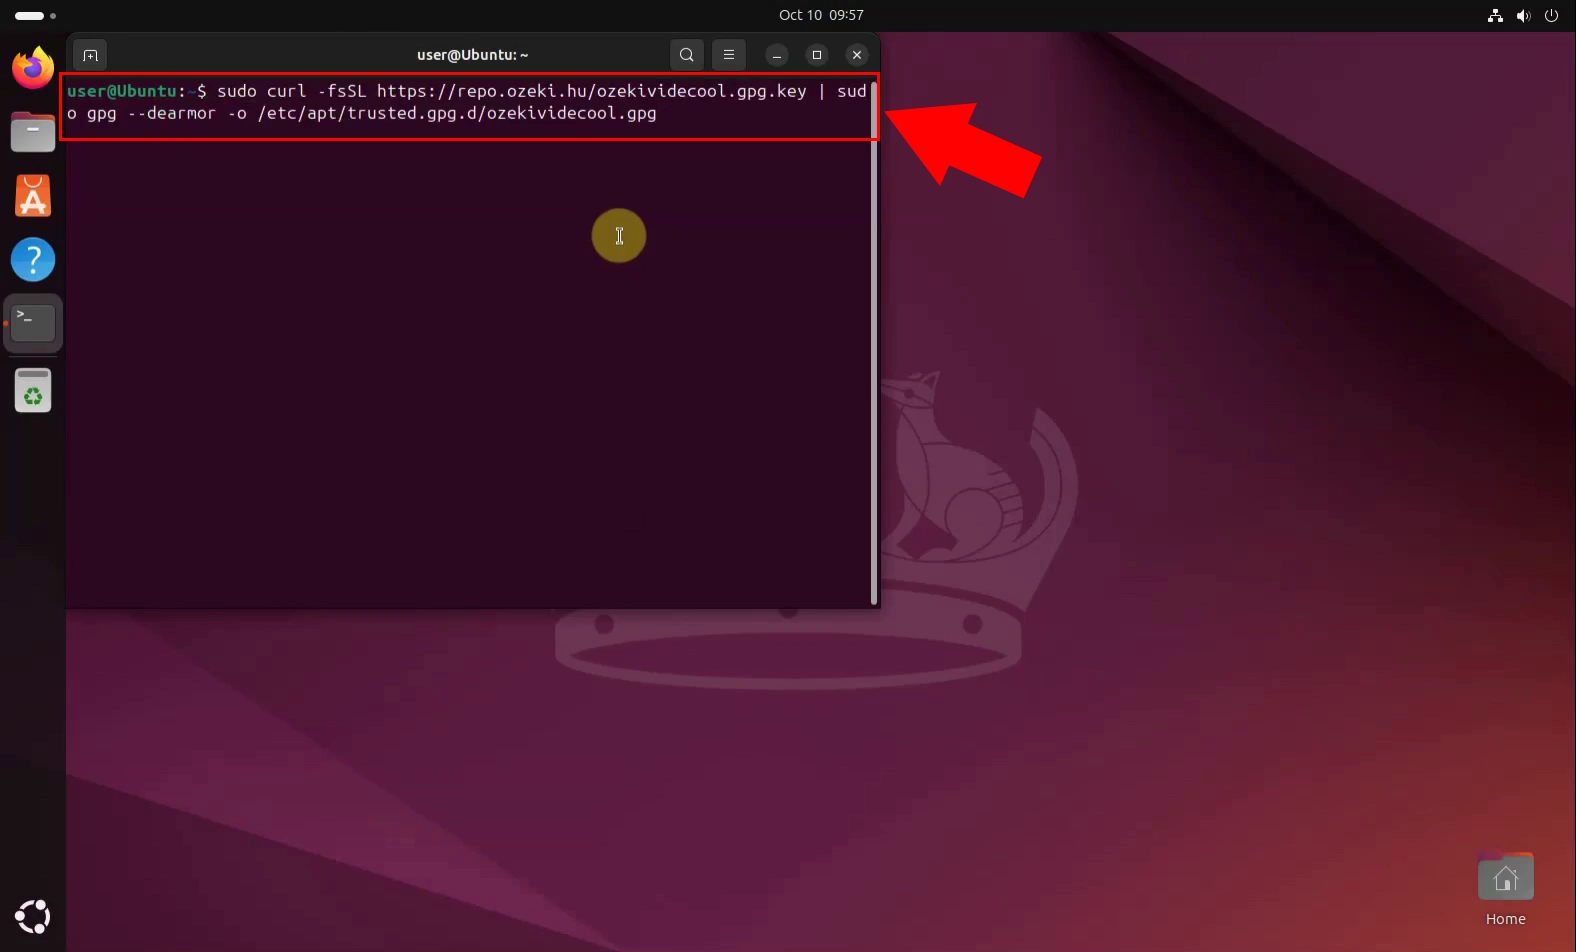
Figure 1 demonstrates the crucial first step in installing Videocool on Ubuntu Linux: adding the GPG key to authenticate packages from the Ozeki repository. This is done by fetching the key via curl and converting it into a trusted format using gpg --dearmor, then saving it to the appropriate directory. This ensures secure and verified communication between your system and the Videocool repository.
sudo curl -fsSL https://repo.ozeki.hu/ozekividecool.gpg.key | sudo gpg --dearmor -o /etc/apt/trusted.gpg.d/ozekividecool.gpg
Step 2: Add the Ozeki Repository
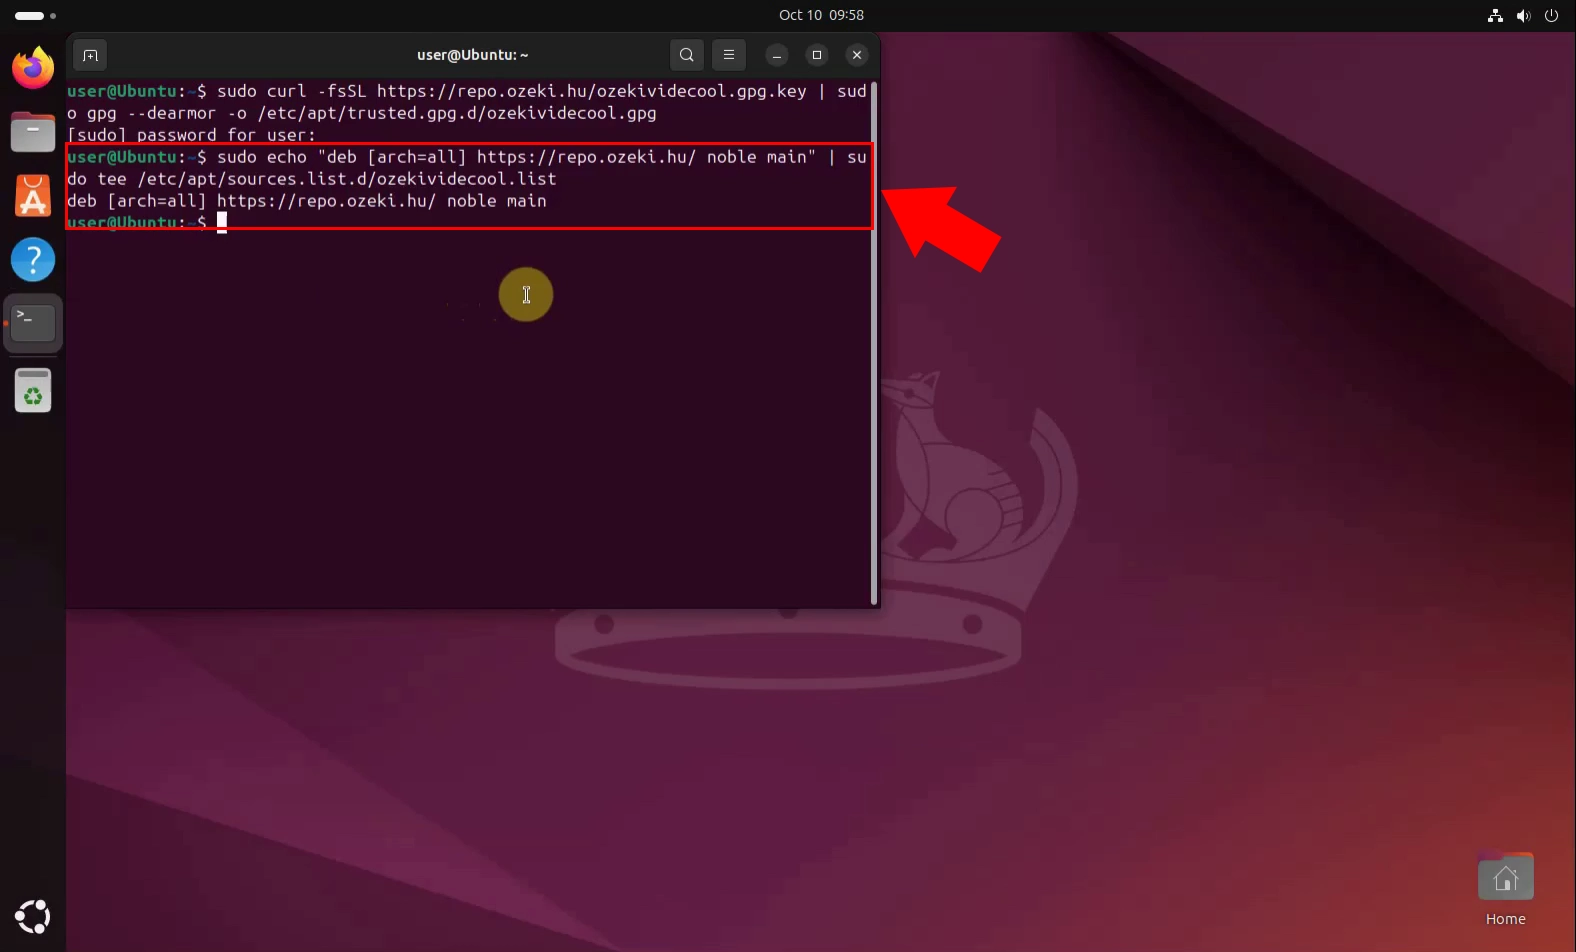
Figure 2 illustrates how to add the Ozeki repository to your Ubuntu system, a key step in enabling access to the Videocool installation package. By echoing the repository URL into a new .list file within the sources.list.d directory, your system is configured to retrieve software updates directly from Ozeki's secure server. This ensures that future installations and updates of Videocool are streamlined and authenticated.
sudo echo "deb [arch=all] https://repo.ozeki.hu/ noble main" | sudo tee /etc/apt/sources.list.d/ozekividecool.list
Step 3: Update the package list
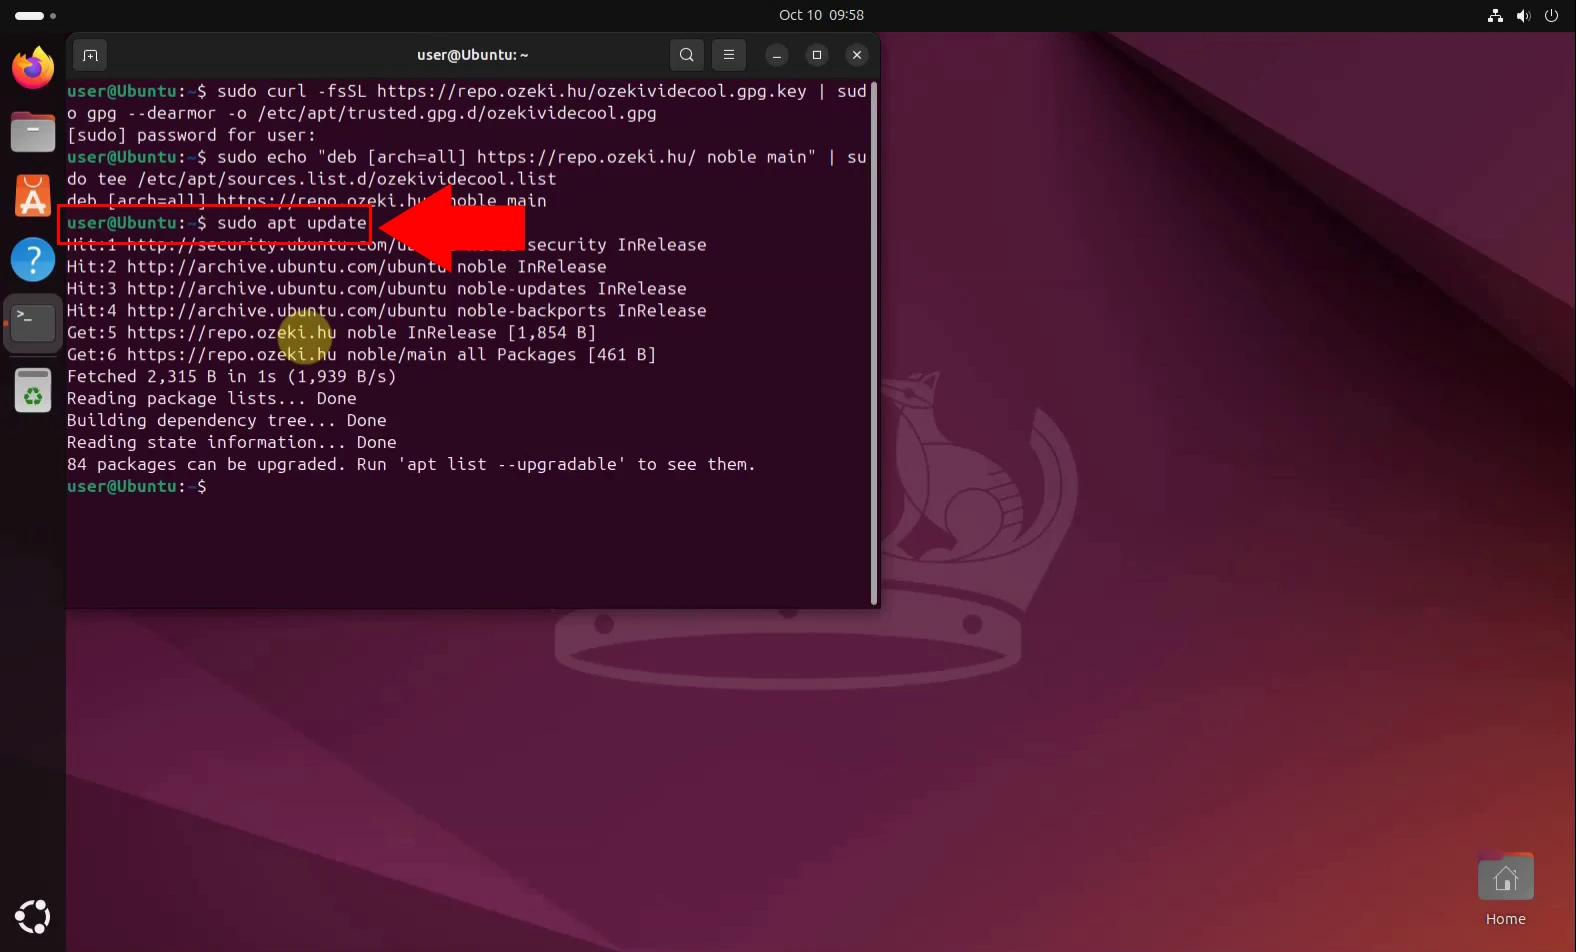
Figure 3 shows the command used to refresh your system’s package index after adding the Ozeki repository. Running sudo apt update ensures that Ubuntu recognizes the newly added source and retrieves the latest package information, including Videocool. This step is essential before proceeding with the actual installation to avoid missing or outdated dependencies.
sudo apt update
Step 4: Install VideCool
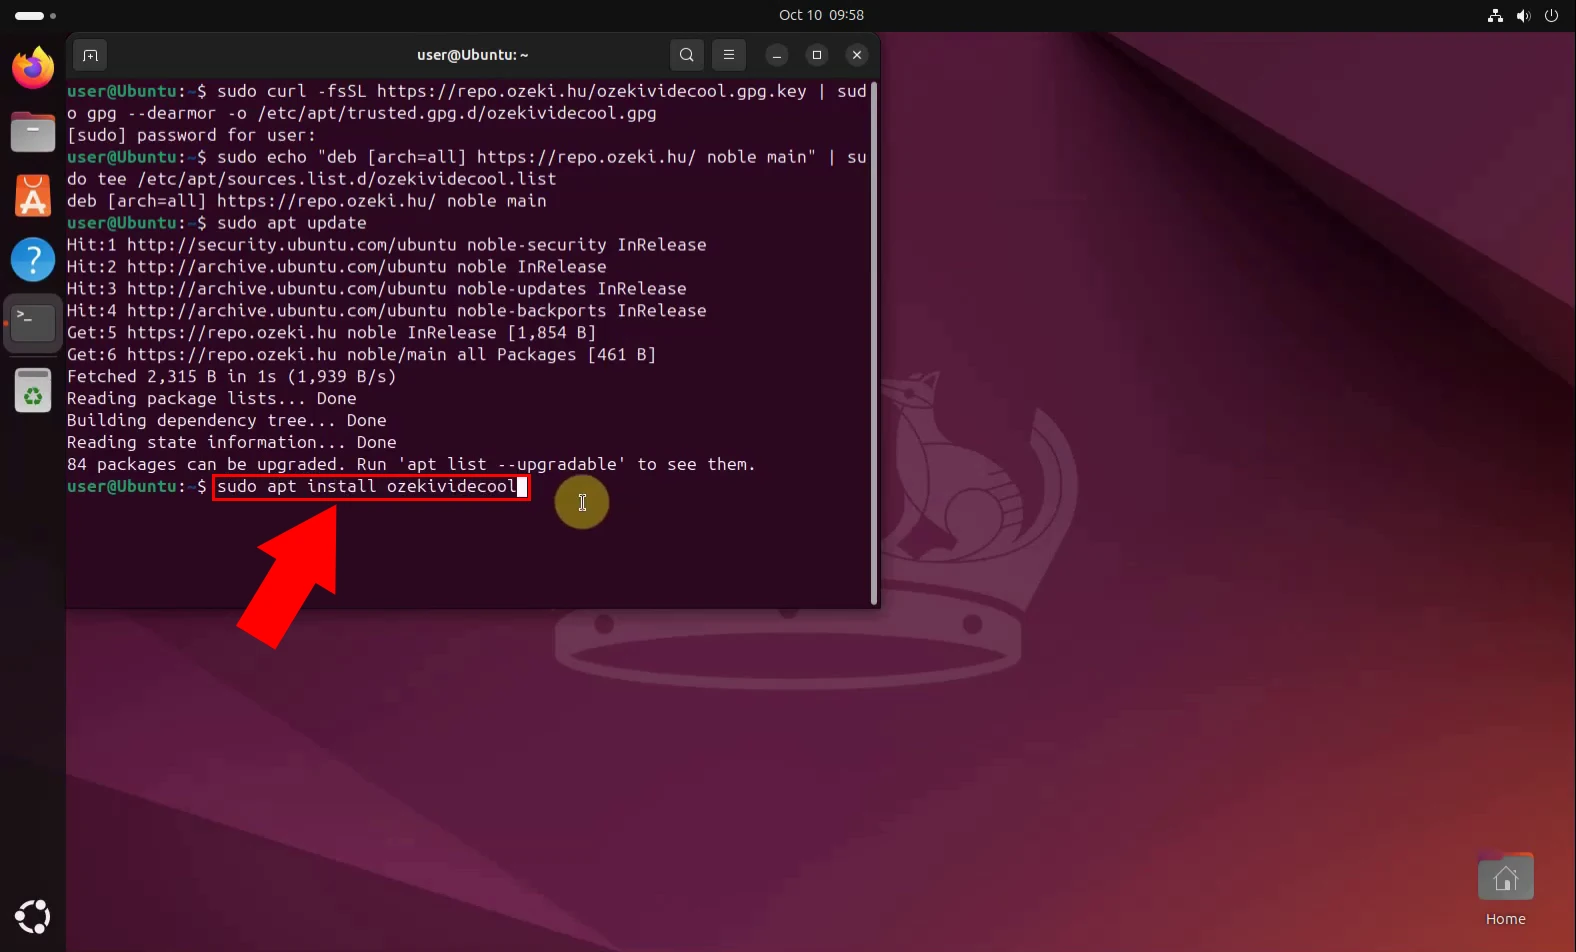
Figure 4 presents the final installation step for setting up VideCool on Ubuntu Linux. By executing the command sudo apt install ozekividecool, users initiate the download and installation of the VideCool package from the Ozeki repository. This command ensures that all necessary components are properly configured, enabling users to launch the application and begin creating videos seamlessly.
sudo apt install ozekividecool
Step 5: Open VideCool in a browser
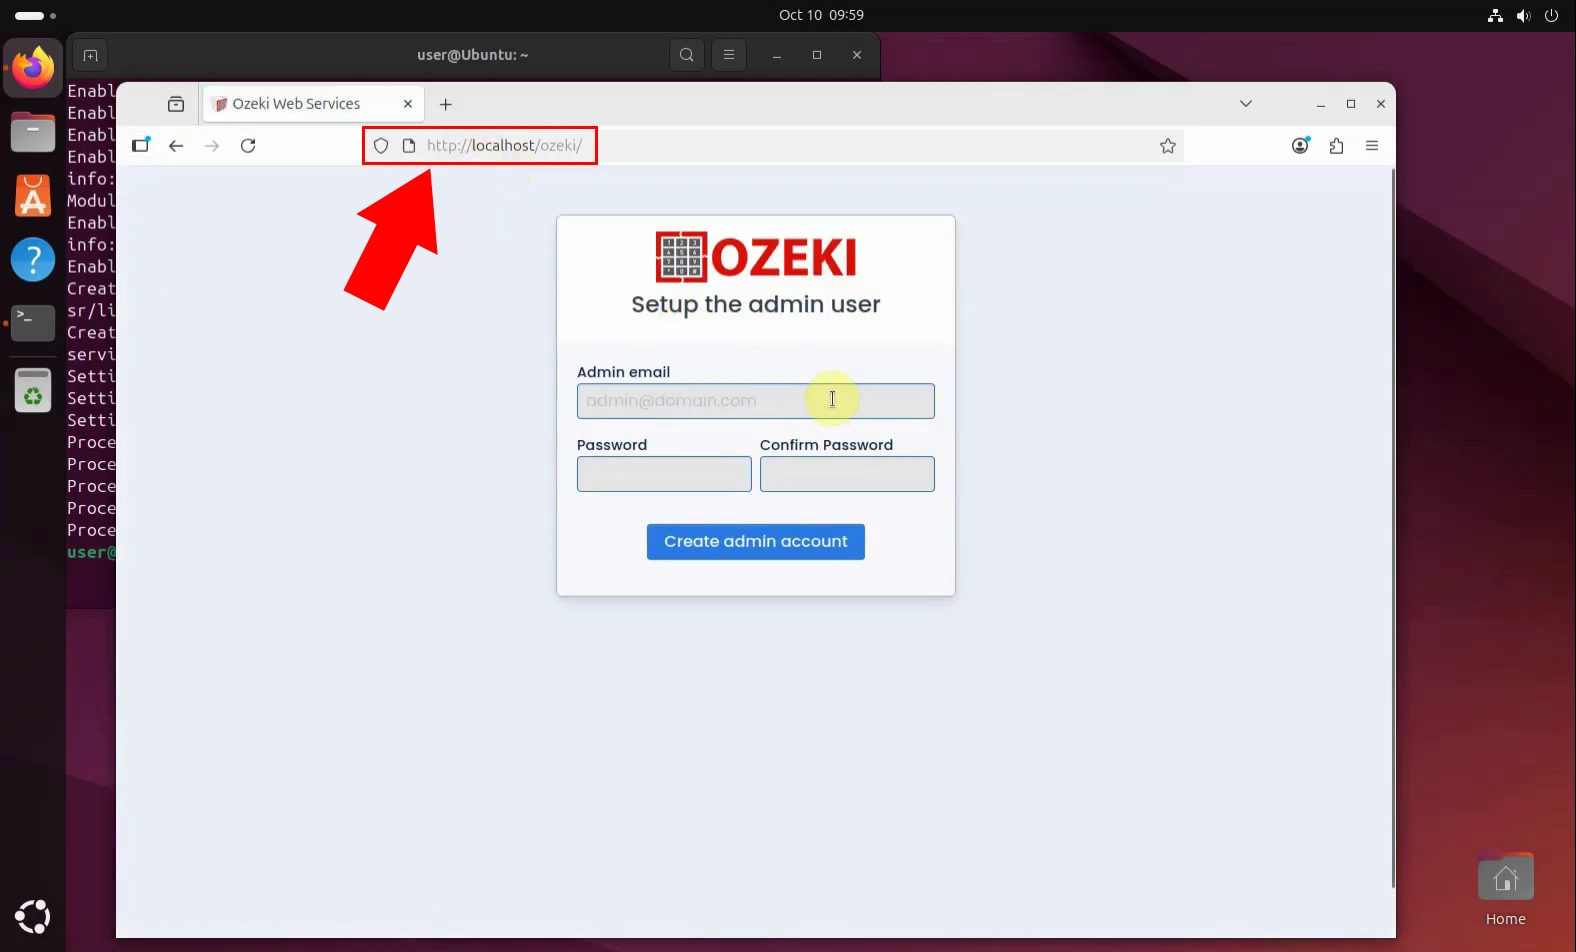
Once the software is successfully installed, users can launch it by navigating to http://localhost/ozeki in any modern web browser. (Figure 5) This local address connects directly to the VideCool interface, allowing users to begin managing video projects and accessing its full suite of features from a convenient, browser-based dashboard.
Step 6: Create Admin Account
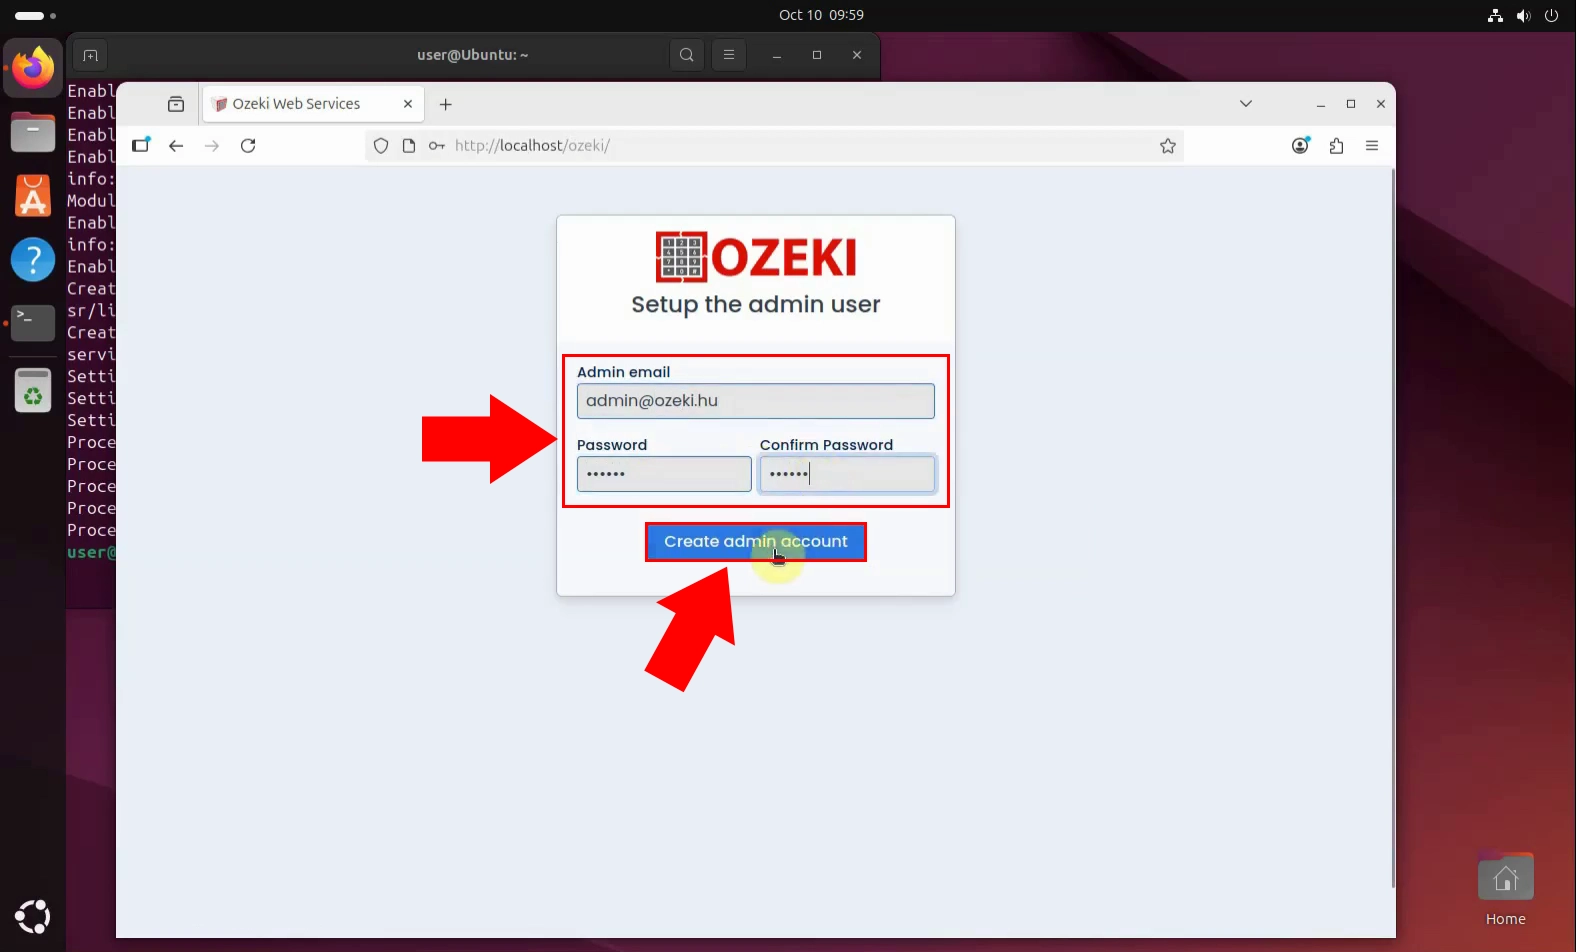
Figure 6 marks the beginning of VideCool’s configuration process with the creation of an admin account. This step is essential for securing access and managing the application’s settings. Users are prompted to define a email address and password, establishing administrative control over VideCool’s features and ensuring that only authorized individuals can modify system configurations or access sensitive tools.
Step 7: Log In as Admin
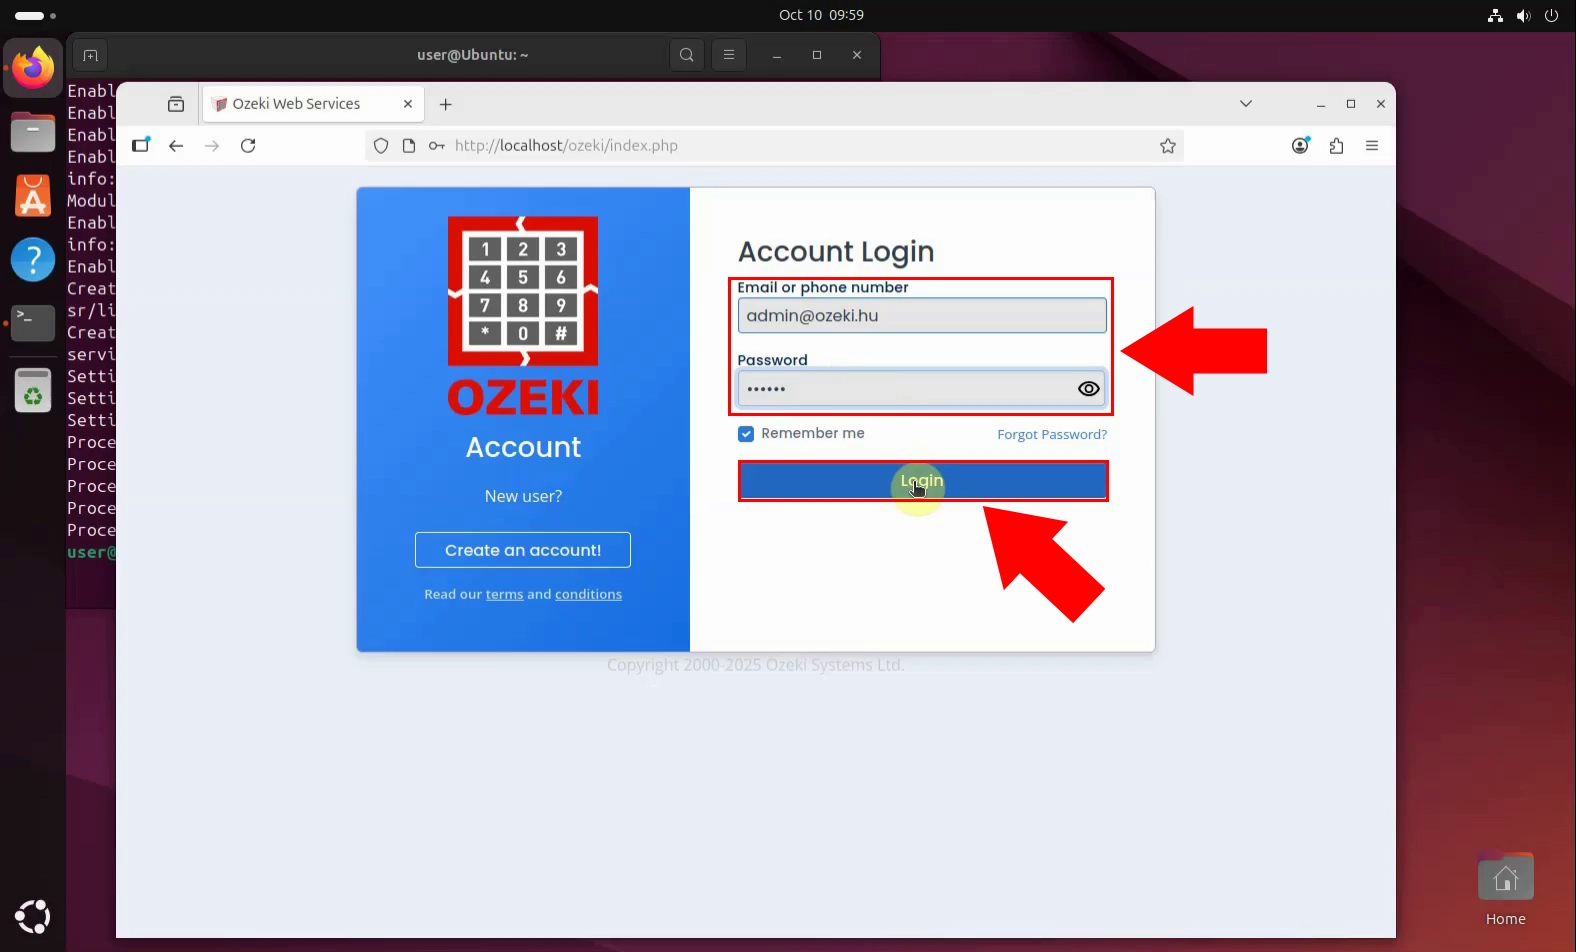
The next step in setting up VideCool: logging in as the Admin user. After creating the admin account, users must enter their chosen credentials to access the system’s full functionality. This login grants administrative privileges, allowing configuration of services, management of video projects, and control over user access—all from a secure, browser-based interface. (Figure 7)
Step 8: View the VideoBuilder Service
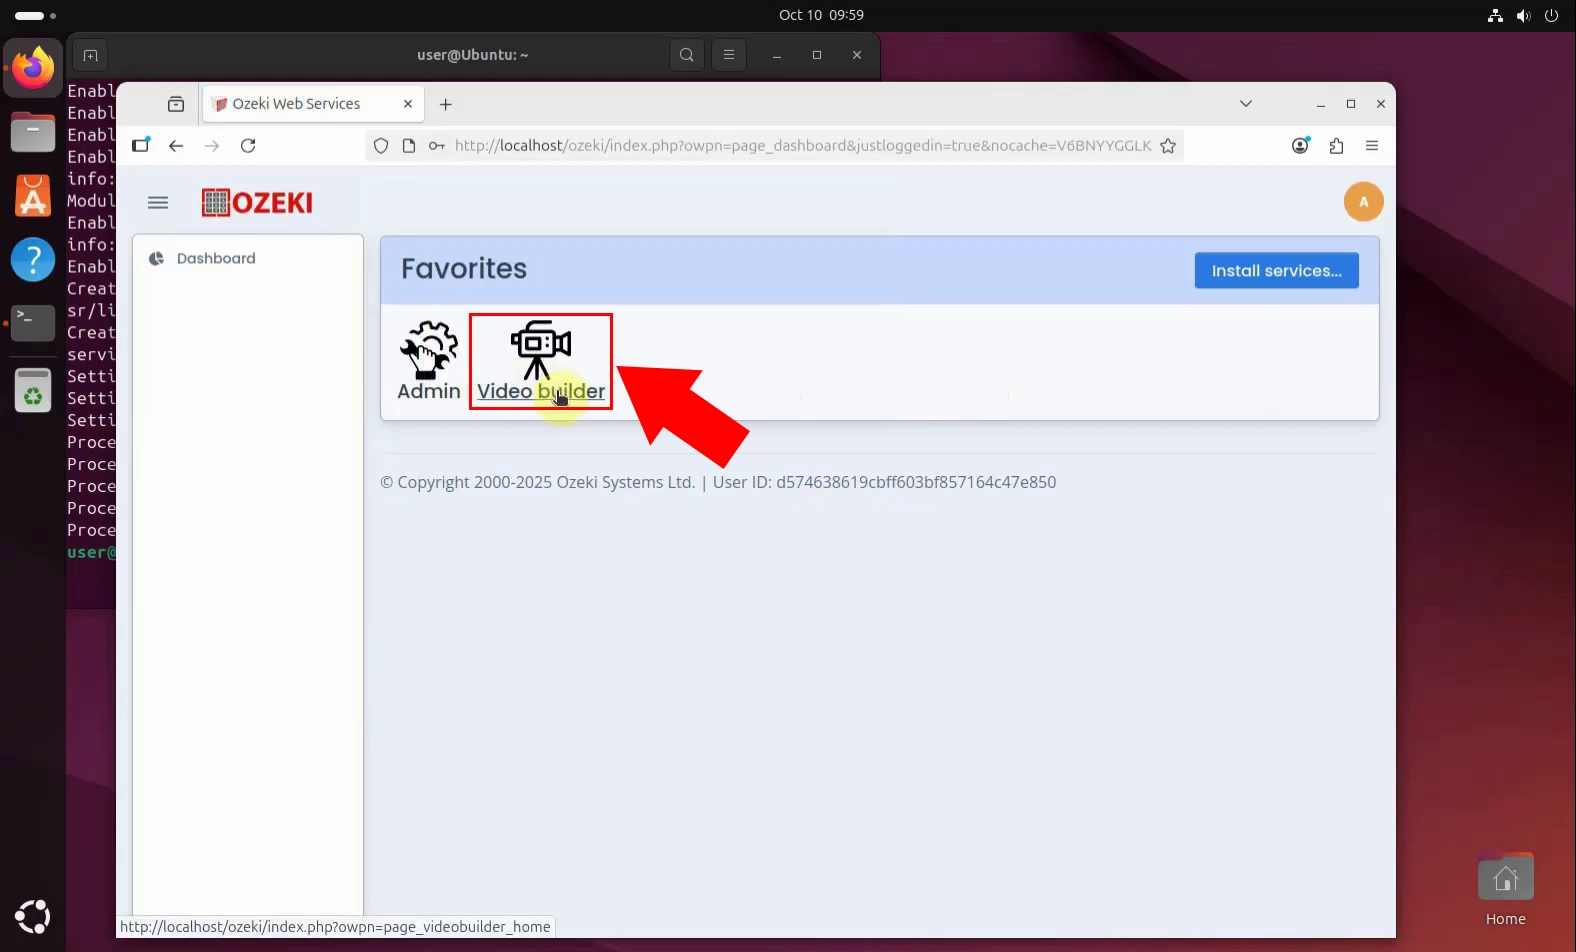
Figure 8 introduces the VideoBuilder service, the core component of VideCool where users begin crafting their video content. After logging in as the admin, launching VideoBuilder provides access to a suite of tools designed for assembling, editing, and managing video projects. This intuitive interface streamlines the creative process, allowing users to combine media elements, apply effects, and configure output settings—all within a browser-based environment.
Step 9: Explore the Dashboard
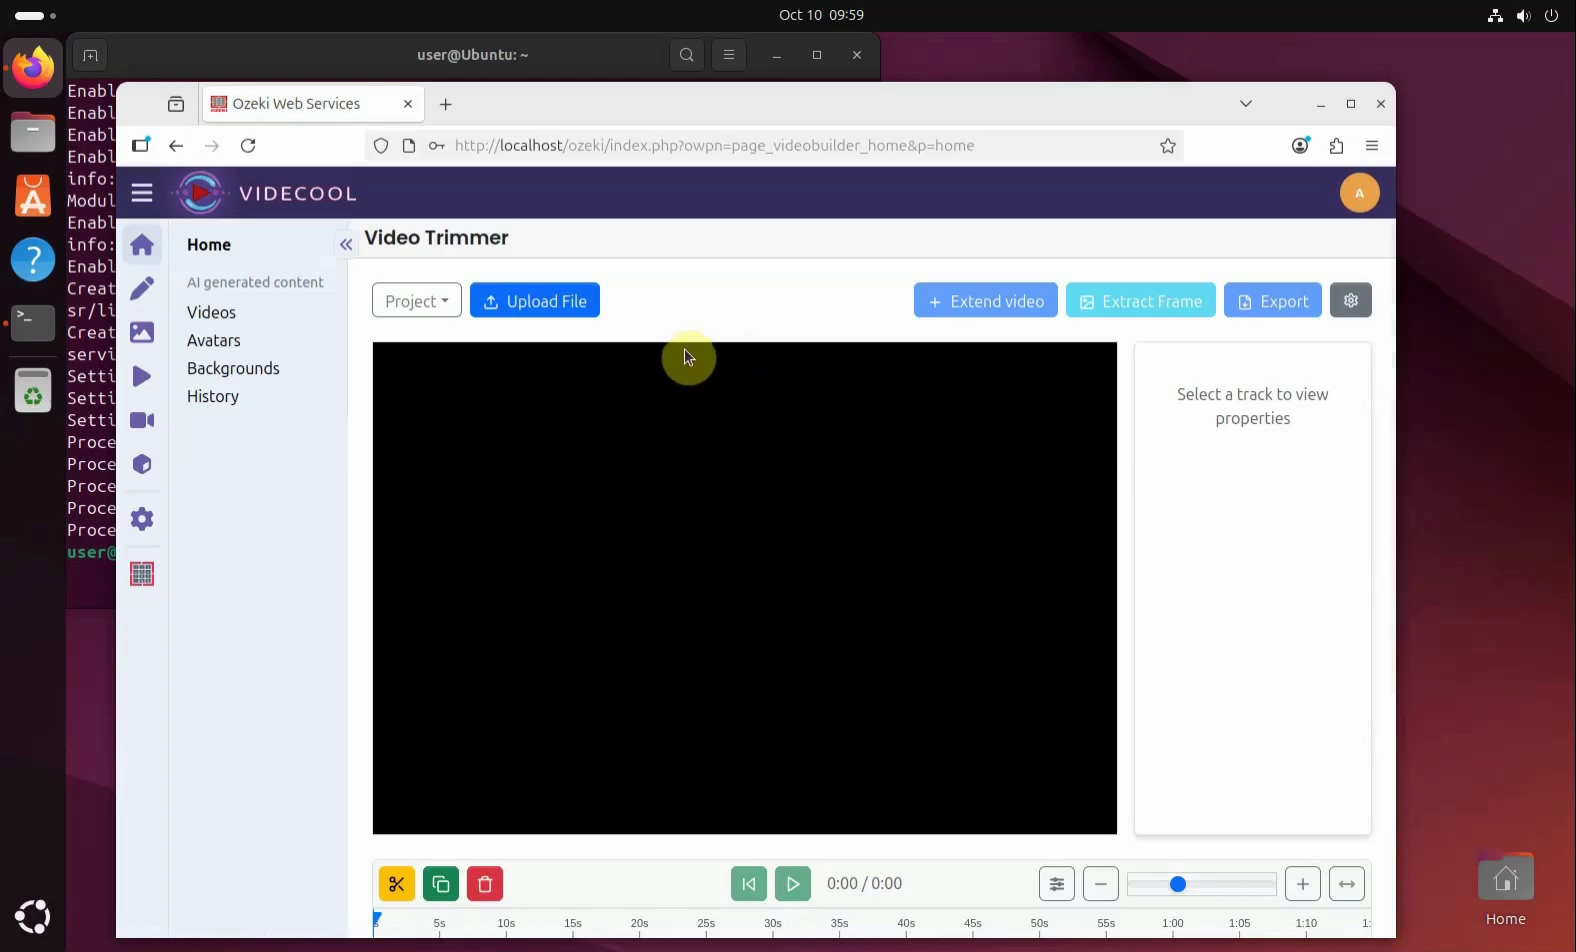
The VideCool home page is the central hub where users begin their video creation journey. After completing installation and configuration, this interface provides streamlined access to all VideCool services, including project management, editing tools, and system settings. Designed for clarity and efficiency, the home page empowers users to navigate features effortlessly and start producing high-quality video content right away. (Figure 9)
Summary
To sum it up, installing Videocool on Ubuntu Linux is a streamlined process designed for ease and security. By adding the GPG key and Ozeki repository, updating the package index, and running a simple install command, users can quickly set up the software. Once installed, Videocool is accessed via a browser interface, where users create an admin account and launch the VideoBuilder service to begin crafting video content. The guide ensures users can confidently navigate each step, making professional-grade video creation accessible from their desktop.