
AI Image to image Flux 2 Dev ComfyUI workflow for Videcool
The Flux 2 Dev image-to-image workflow in Videcool offers a practical way to edit an existing image with prompt-guided generation by using a ComfyUI pipeline built for Flux 2 Dev. It loads the Flux 2 Dev diffusion model, VAE, and text encoder, then transforms an input image into a newly edited version through image scaling, latent preparation, prompt conditioning, reference latent guidance, advanced sampling, and final image decoding.
What can this ComfyUI workflow do?
In short: prompt-based image editing with Flux 2 Dev.
This workflow accepts an existing input image, scales it to a target working
resolution with ImageScaleToTotalPixels, reads the image size, prepares a
matching empty Flux 2 latent, encodes the source image into latent space, applies a
positive text prompt, combines that prompt with Flux guidance and reference latent
conditioning, runs the edit through advanced sampling, decodes the result with the
Flux 2 VAE, and saves the final generated image for use in Videcool.
Example usage in Videcool
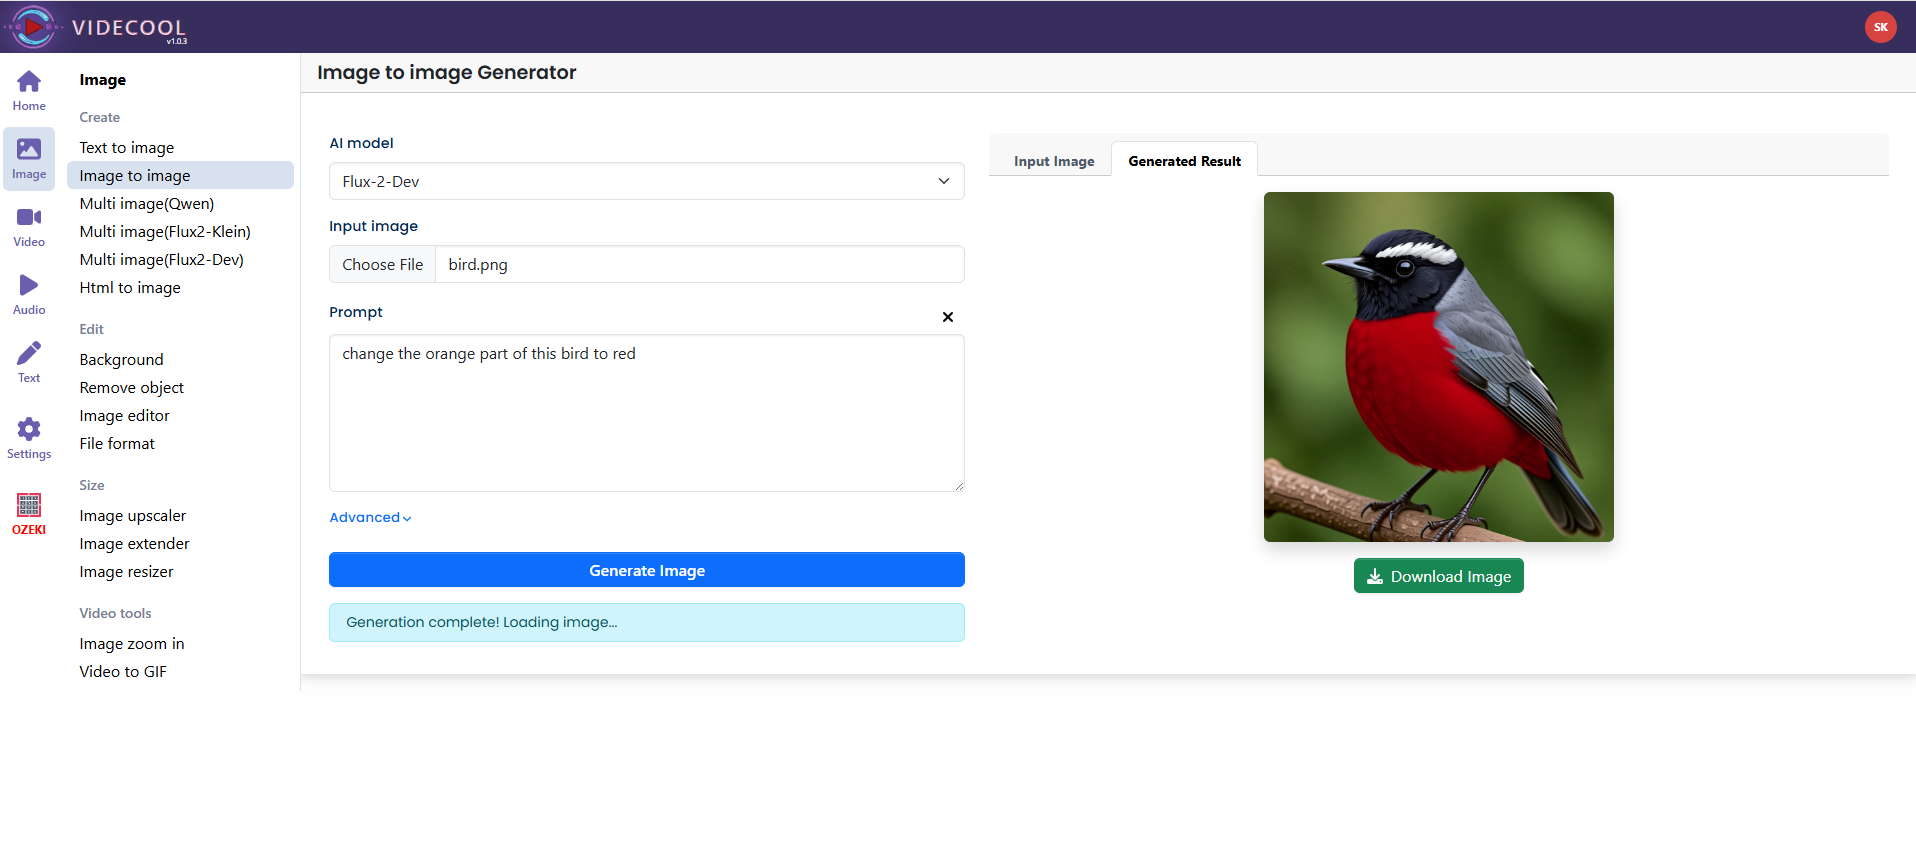
Download the ComfyUI workflow
Download ComfyUI Workflow file: flux_2_dev_image_to_image-api.json
Image of the ComfyUI workflow
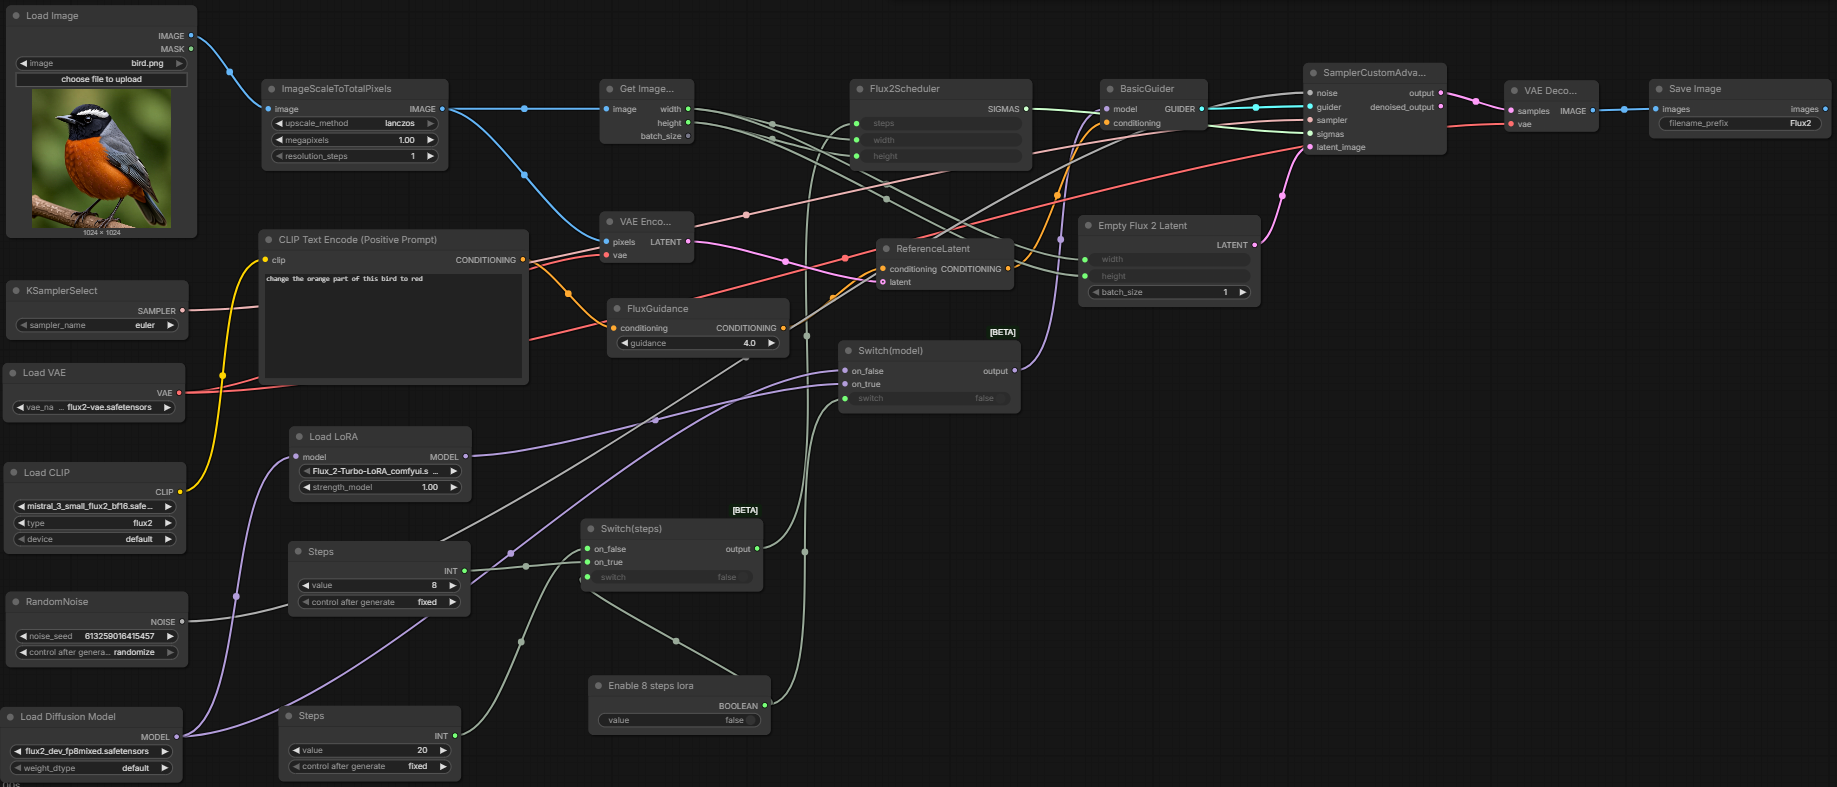
Installation steps
Step 1: Download flux2_dev_fp8mixed.safetensors into /ComfyUI/models/diffusion_models/flux2_dev_fp8mixed.safetensorsStep 2: Download flux2-vae.safetensors into /ComfyUI/models/vae/flux2-vae.safetensors
Step 3: Download mistral_3_small_flux2_bf16.safetensors into /ComfyUI/models/text_encoders/mistral_3_small_flux2_bf16.safetensors
Step 4: Optional: if you want to use the fast 8-step mode shown in the workflow, download Flux_2-Turbo-LoRA_comfyui.safetensors into /ComfyUI/models/loras/Flux_2-Turbo-LoRA_comfyui.safetensors
Step 5: Download the flux_2_dev_image_to_image-api.json workflow file into your home directory.
Step 6: Restart ComfyUI so the newly added model files are detected.
Step 7: Open the ComfyUI graphical user interface.
Step 8: Load the
flux_2_dev_image_to_image-api.json workflow file in the ComfyUI GUI.Step 9: Load the source image you want to edit into the image input node.
Step 10: Enter a prompt that clearly describes the modification you want to make.
Step 11: Optionally adjust seed, megapixels, sampler, guidance, or switch on the Turbo LoRA mode for faster 8-step generation instead of the default 20-step mode.
Step 12: Run the workflow to generate and save the edited image.
Prerequisites
To run the workflow correctly, place the required Flux 2 Dev diffusion model, VAE, and text encoder files into the proper ComfyUI model directories before loading the workflow. If you want to use the optional accelerated mode in this graph, the Turbo LoRA file must also be installed so the model switch can change from the base model path to the LoRA-enhanced path.
How to use this workflow in Videcool
Videcool can use this workflow to edit an existing image directly from a text instruction without requiring manual graph construction in ComfyUI. After importing the workflow, choose the source image, define the modification in the prompt, and run the graph to produce a final edited image that follows the prompt while preserving important visual structure from the original image through latent reference conditioning.
ComfyUI nodes used
- Load Image
- ImageScaleToTotalPixels
- Get Image Size
- Empty Flux 2 Latent
- Load Diffusion Model
- Load LoRA
- Switch(model)
- Load VAE
- Load CLIP
- CLIP Text Encode (Positive Prompt)
- FluxGuidance
- VAE Encode
- ReferenceLatent
- BasicGuider
- Flux2Scheduler
- RandomNoise
- KSamplerSelect
- SamplerCustomAdvanced
- VAE Decode
- Save Image
- PrimitiveBoolean
- PrimitiveInt
Base AI model
This workflow is built on Flux 2 Dev, using the
flux2_dev_fp8mixed.safetensors diffusion model together with the
flux2-vae.safetensors VAE and the
mistral_3_small_flux2_bf16.safetensors text encoder. The workflow also
includes an optional Turbo LoRA path that can be enabled with a boolean switch for
a faster low-step generation mode.
The graph combines prompt encoding, Flux guidance, source-image VAE encoding, reference latent conditioning, scheduler-driven sampling, and final VAE decoding in one practical local workflow. This makes it a useful starting point for creators who want controlled image edits inside a local AI-assisted media production pipeline.
Image resolution
The workflow automatically scales the source image with the
ImageScaleToTotalPixels node and then derives the working width and
height with GetImageSize. This allows the latent generation stage and
scheduler to stay aligned with the resized source image while still letting the
user control the effective working resolution through the megapixel setting.
Sampling and speed modes
The workflow supports two generation paths controlled by a boolean switch. In the default path, it runs the base Flux 2 Dev model with 20 steps, while the optional Turbo LoRA path switches to an 8-step mode intended for faster generation. The workflow also uses the Euler sampler, a random noise seed, and Flux 2 scheduler settings derived from the chosen image size and step count.
Conclusion
The Flux 2 Dev image-to-image ComfyUI workflow gives Videcool users a simple and effective way to modify images with natural language instructions. By combining source image input, prompt conditioning, Flux guidance, reference latent guidance, advanced sampling, and final decoding in one clear graph, it provides a solid workflow for both quick edits and more advanced experimentation in local AI image production.